Preface
Last year in July or so, I started to seriously learn C++ as it looked like a good choice for a second language. My first language was Python and it served me well for 2 years, but I felt it was a good time to switch to a language which allows to ‘peek under the hood’ if need arises. Modern C++ has come a long way from the “C with Classes” mindset, incorporating more features which allow high level abstractions while giving the programmer a tight control over the performance. This project was part of the Advanced C++ Tutorial, although my code deviates from author’s.
Mandelbrot fractal
The Mandelbrot set is a set of values in the complex plane where for every point z, the function f(z) = z^2 + c does not diverge. What this translates to while implementing in code is somewhat like this:
- Choose a point in our complex plane say, P (x, y).
- The test for convergence for a point in Mandelbrot set is to check the absolute value of function f(z), starting with z=0 and c=P. If this absolute value goes greater than 2, the sequence will escape to infinity. The maximum number of iterations per pixel are limited to 256.
- For pixels where iterations < 256, assign them a colour value. Else each pixel has black colour.
- Each pixel is bucketed based on the number of iterations and each bucket is assigned a colour.
- Now that every pixel has a colour assigned to it, draw the image.
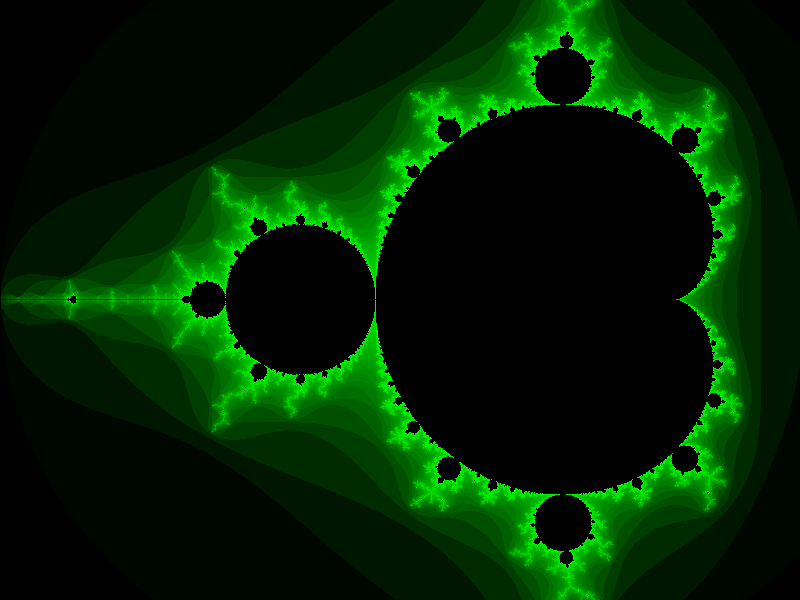
The above steps will give you the most common Mandelbrot shape. Here’s mine in monochrome:
Once the value for the pixels has been calculated, we can zoom in on a point by repeating steps from 2 to 5. A number of points and their respective scaling factors can be added using the addZoom method for any FractalCreator object. The output will be generated iteratively after going through all points in the underlying storage provided by the ZoomList object.
My choice of image format for this was bmp, which as it turns out was a pretty poor choice to write this Mandelbrot data in. The API for updating each pixel takes in x and y coordinates and the data array which contains the image pixel data. This assumes x and y coordinates start at the top left corner of an image whereas those for BMP file start from the bottom left corner which did not bode well once I made changes for the unistride access. The code for this is available on github.
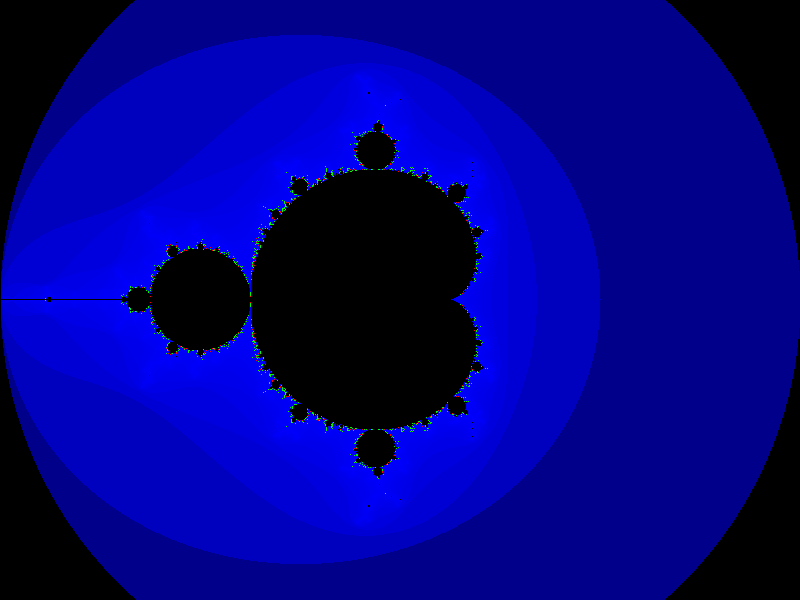
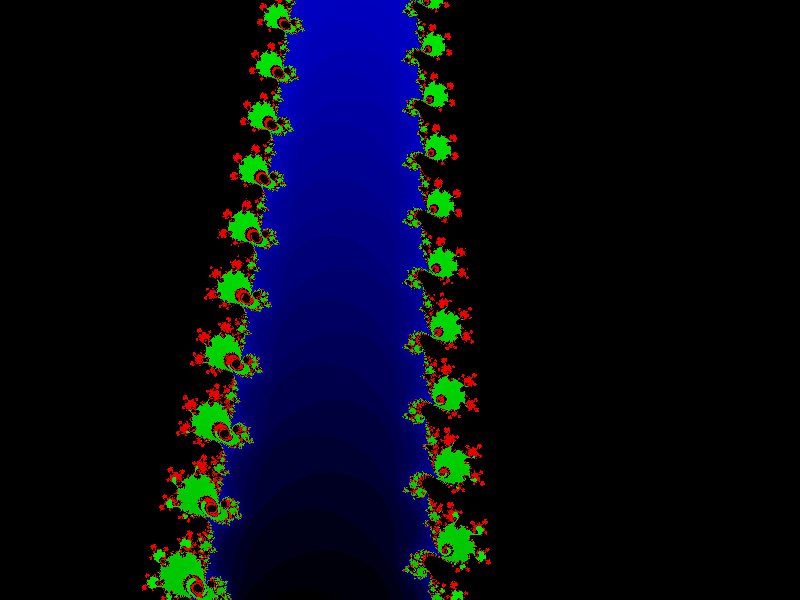
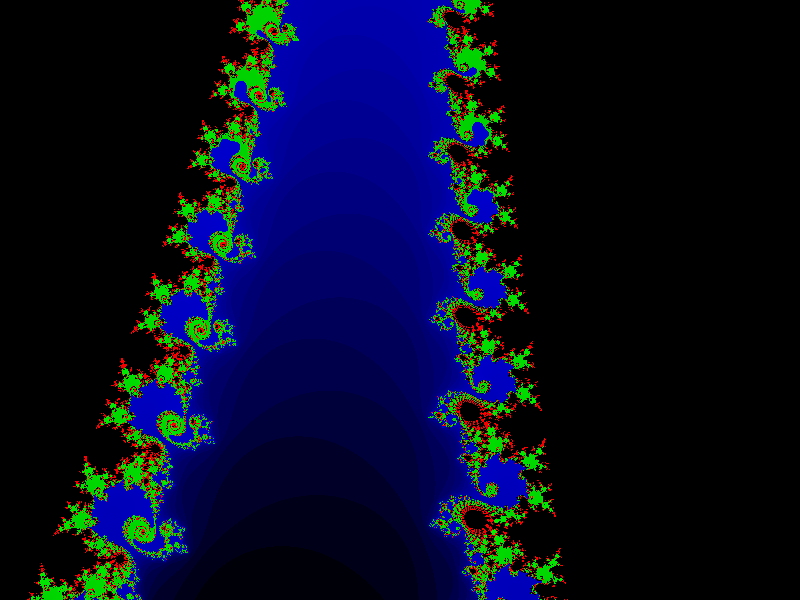
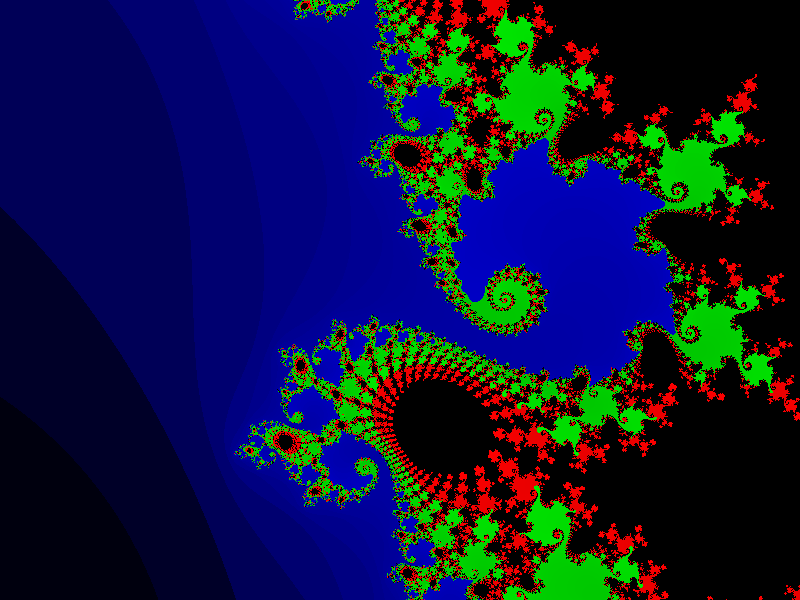
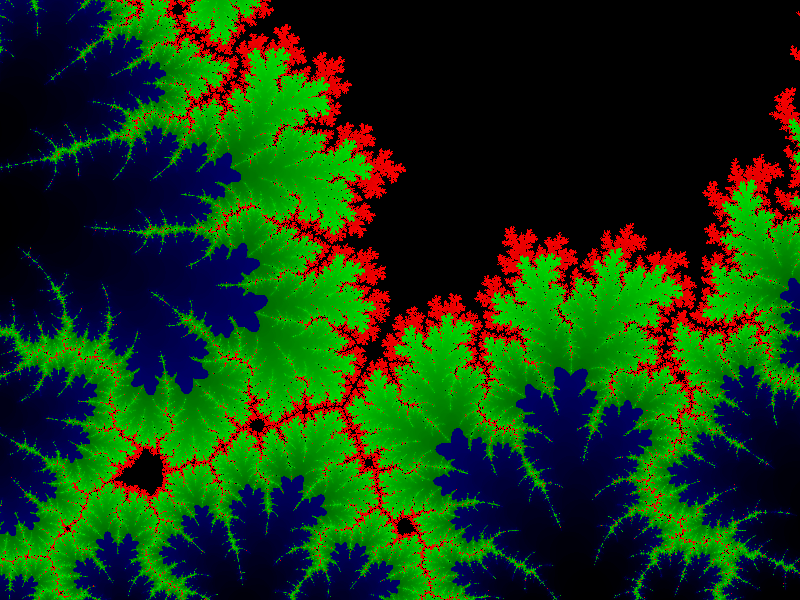
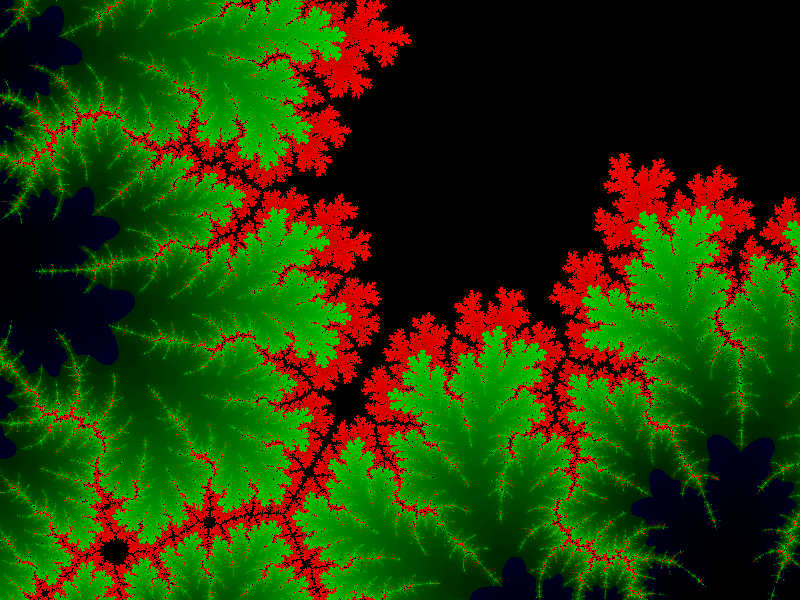
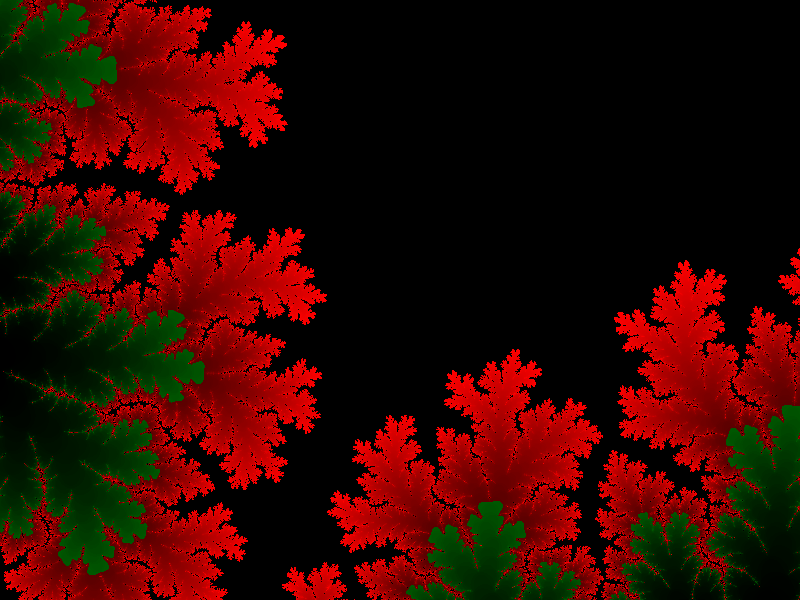
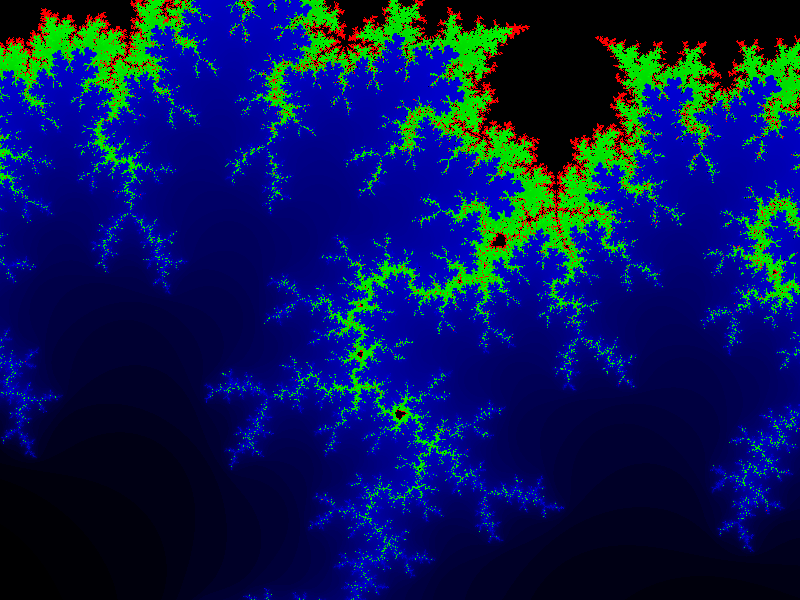
Gallery
Here is a small collection of the generated images
Performance measurements
(Note that the first three iterations in every benchmarking run were ignored in the final computation to compensate for caching effects)
v1.0 and v1.1
As stated earlier, the initial implementation of FractalCreator::calculateIterations and FractalCreator::drawFractal methods was not optimal. I was iterating over row indices in a 2D array rather than column indices. Changing this lead to more than 25x reduction in time. Here is the relevant code diff between v1.0 and v1.1 for FractalCreator.cpp.
@@ -6 +6 @@ FractalCreator::FractalCreator(int width, int height) : m_width(width), m_height
-  m_iterationCounter(m_width, std::vector<int>(m_height, 0)),
+  m_iterationCounter(m_height, std::vector<int>(m_width, 0)),

@@ -20 +20 @@ void FractalCreator::calculateIterations()
-    for (int x = 0; x < m_width; x++)
+    for (int x = 0; x < m_height; ++x)

@@ -22 +22 @@ void FractalCreator::calculateIterations()
-        for (int y = 0; y < m_height; y++)
+        for (int y = 0; y < m_width; ++y)

@@ -42 +42 @@ void FractalCreator::drawFractal()
-    for (int x = 0; x < m_width; x++)
+    for (int x = 0; x < m_height; ++x)

@@ -44 +44 @@ void FractalCreator::drawFractal()
-        for (int y = 0; y < m_height; y++)
+        for (int y = 0; y < m_width; ++y)
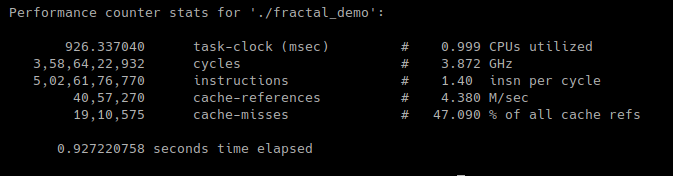
Average timing for v1.0:
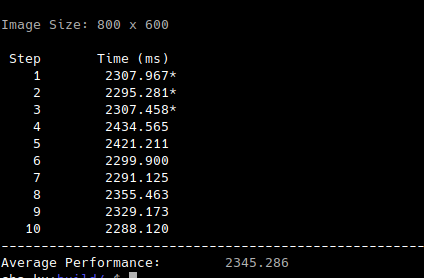
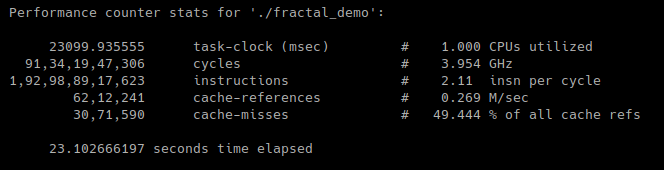
Performance for v1.0:
Average timing for v1.1:
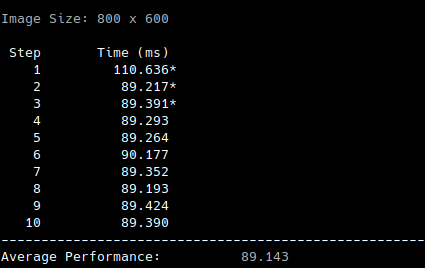
Performance for v1.1:
The low number of cache references in v1.1 could be attributed to locality of reference, especially to spatial locality - where it is the tendency of a processor to make use of data within close storage locations. For example, say our cache size is 256 bits and the data to be processed is 16 bits long. It is likely that a contiguous 256-bit chunk of data, starting at our 16-bit data will be cached. Access to cache takes 0.5 ns while access to DRAM takes 100 ns. The source may be outdated, but the idea that cache access is much faster than main memory still prevails. So much so, that Intel in their Xeon Phi processors have implemented an on-package, high-bandwidth memory called MCDRAM. This can be configured as L3 cache with size upto 16GB which can allow entire application to be cached, which is especially helpful for high performance computing workloads. The case for data locality in caches is also highlighted in a section of Chandler Carruth’s CppCon 2014 talk. He talks about how bubble sort with O(n^2) runtime complexity will win over any other sorting algorithm for small datasets thanks to locality of reference.
The binary size for v1.1 was 31Kb, a massive improvement from 107Kb for v1.0, which could be due to the reduced number of instructions in the final executable.
Further optimizations can be done by using the OpenMP pragma for which allows us to use the inbuilt ‘worksharing’ constructs on multi-core processors by farming out chunks of data on multiple cores. I was running this on an 8 core machine so in total 8 threads were spawned. OpenMP provides a number of constructs for writing parallel code, which is definitely worthy of a completely different blog post.
Average timing for v1.2:
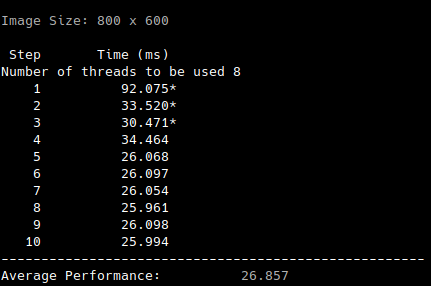
Performance for v1.2:
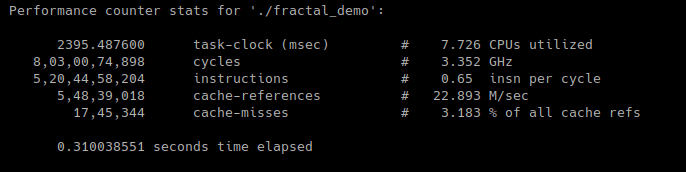
Notice the low number of cache misses and a 3x reduction in execution time. The only change from v1.1 to v1.2 was the addition of #pragma omp parallel for directive.
Conclusions
This project has definitely taught me a thing or two about procedural generation and writing data to files. But most importantly, there were some important learnings in writing performance-critical code. The performance improvements, however, has had an effect on output herein the generated image comes out rotated 90 degrees counterclockwise. I think that may be due to a quirk in BMP files’ spatial coordinates. There is definitely a lot of scope to improve and try out new things. Migrating the image writing part to SDL, adding keyboard navigation, advanced histogram colouring techniques are some things right off the top of my head. I hope to have an update on this sometime in future.
Till then, please do let me know your thoughts and if there are any grammatical/technical mistakes, I am happy to be corrected :)